Sensor error (NIO)
When a sensor delivers no or implausible values
HydroCommander reports a sensor error (NIO = not OK; the device shows "FAULT") when a zone gets no usable readings. In Automatic and AI mode the zone then stops watering — protecting against watering too much or too little based on wrong values. A watering schedule keeps running; it does not need the sensor.
The sensors are digital and deliver moisture ready-made in percent. That leaves only a few failure patterns — and the most common one is a simple connector problem.
TYPICAL SYMPTOMS
- No value arrives at all — the connector is not seated properly, the cable is damaged or the sensor is defective. By far the most common case.
- The value sits permanently at 0% — the sensor is not in the soil or has no soil contact.
- Values jump back and forth — usually a loose contact at the connector or a kinked cable.
- Values look plausible but the plant still suffers — then it is not a sensor fault but the placement (see "Understanding & checking sensors").
- Slow drift over weeks — salt or fertilizer deposits on the sensing area.
1Identify the affected zone
In the zone detail view a zone with a sensor problem is clearly marked — in the app as well as on the device. The last measured value helps narrow it down: if no value arrives at all, that points to a connection problem; if the value sits firmly at 0%, soil contact is more likely missing.
2Check the connector — the most common case first
Unplug the sensor's USB-C connector at the device, take a quick look (dirt, bent contacts, moisture) and push it straight back in until it clicks.
Caution
The plug has to click noticeably. If it sits only halfway in, the contact works at first and drops out later. Check the socket for dirt or moisture before plugging it back in.
3Enable maintenance mode (recommended)
Before pulling the sensor out of the soil: enable maintenance mode (Settings — in the app under "Maintenance"). It pauses all zones and freezes statistics and AI learning — so the sensor in the air will not corrupt any data.
4Inspect cable and sensor
Pull the sensor out of the soil and check the whole run: is the cable kinked, crushed or torn anywhere — especially where it enters the soil or passes under a pot? Is the connector firmly attached to the cable? Is the sensing area damaged or covered by a hard crust?
5Clean the sensor
Rinse off soil and salt deposits with water and wipe. The sensor is fully waterproof (IP68) — rinsing is completely safe.
6Function test in air
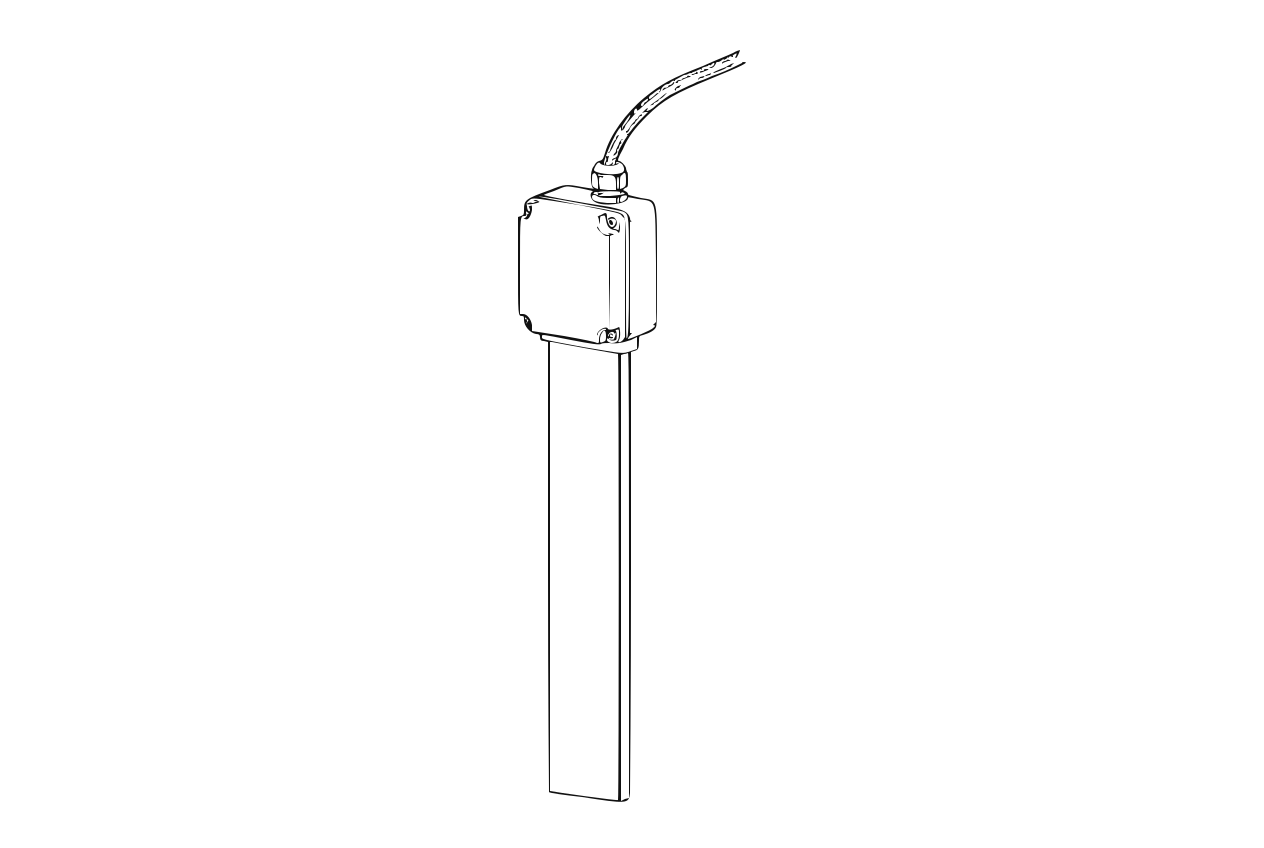
Sensor in the air: the reading must drop clearly Hold the clean, dry sensor freely in the air and watch the displayed value. Expected: a very low value close to 0%.
If the value reacts, the sensor is fundamentally fine — then it is placement or soil. If still no value arrives, it is the connection or the sensor.
7Back into the soil — placed correctly
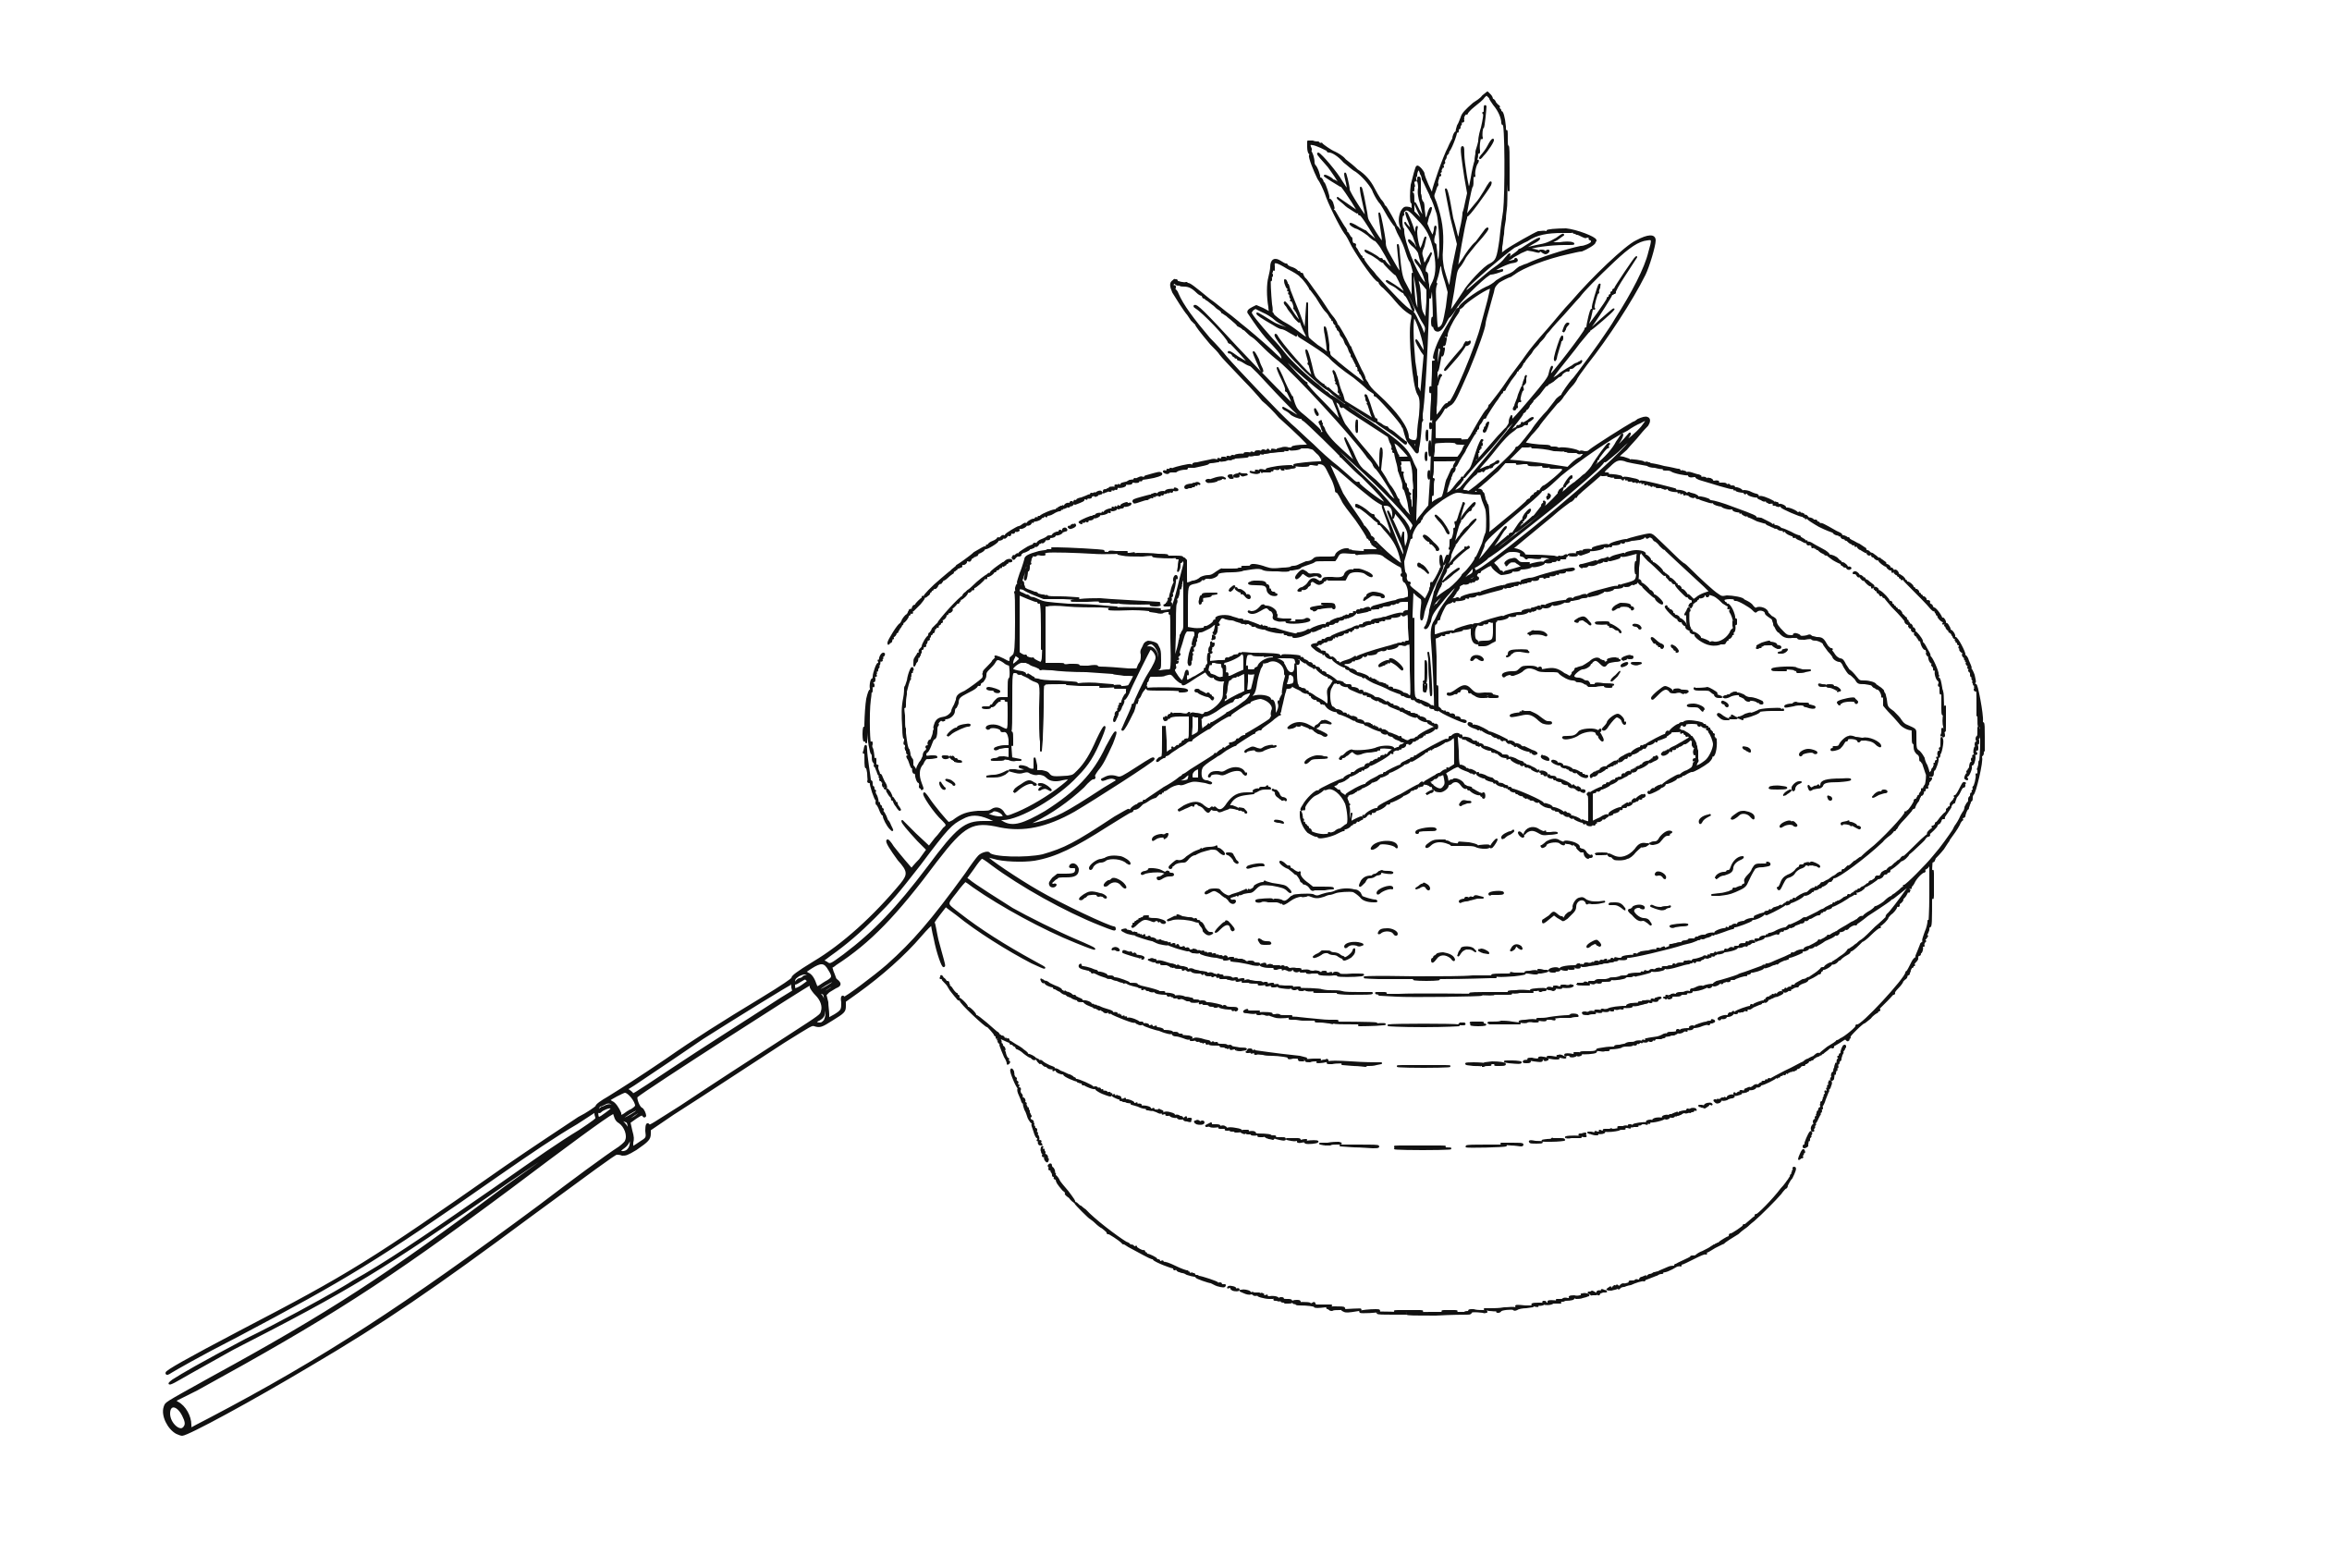
Distributor ringed around the stem, sensor anchoring it alongside Insert the sensor fully and snugly into the soil again and press the substrate down lightly all around so no air gaps remain. After a few minutes a plausible moisture value should appear.
8Reset the AI learning table
After a longer fault or a sensor swap: in the app zone detail → AI insights → "Reset learning table"; on the device zone settings → "AI mode" → "Insights" → "Reset learning". Otherwise the AI keeps calculating with data from the fault period.
9Replace the sensor (if defective)
If no value ever arrives, or it stays obviously nonsensical: replace the sensor. Unplug the connector, plug in the new sensor — that is all. The sensors are factory-calibrated and need no setup.
Tip
The sensors are consumables: they sit permanently in moist soil, and both the sensing area and the cable entry wear over time. Declining accuracy or failure after extended use is therefore wear and tear and is not covered by any warranty — we deliberately give no warranty of our own on the sensors. Your statutory rights in the event of a defect remain unaffected. Replacement sensors are available individually via the website.
10Switch maintenance mode off again
Do not forget: disable maintenance mode so the zones water automatically again.
Caution
As long as maintenance mode is active, no zone waters automatically.
See also: Watering guard: no water arriving
COMMON CAUSES IN DETAIL
- CONNECTOR NOT PROPERLY IN — by far the most common cause. The USB-C plug has to click noticeably; if it sits only halfway in, the contact is unreliable. Fix: unplug, push it straight back in until it clicks.
- DAMAGED CABLE — kink, crush or tear, often where the cable enters the soil or runs under a pot. Fix: relieve the strain and reroute it; replace the sensor if damage is visible.
- NO SOIL CONTACT — sensor only half inserted or soil loose all around. The value then stays very low even though watering happens. Fix: insert deeper, press the soil down.
- SALT OR FERTILIZER CRUST — causes a slow drift over weeks. Fix: rinse and wipe the sensing area.
- TEMPERATURE FLUCTUATIONS — slight fluctuations over the day are normal for capacitive sensors. Fix: keep the sensor out of direct sun.
IMPORTANT: Never permanently work around a zone with a sensor problem (e.g. schedule without sensor safety) without clarifying the cause — the risk of over- or underwatering is high. Before longer absences always check the sensor status of all zones.