Calibrate pump
Measure the real flow rate per zone — the basis for all ml figures
Pump calibration measures how much water a zone really delivers in 20 seconds. From that the system computes the flow rate in ml/min — the basis for watering amounts, daily statistics, tank level and vacation forecast.
WHY PER ZONE? The flow depends not just on the pump but on the whole path to the plant: hose length, height difference and above all what is attached at the end: water distributor, Y-splitter and drip hose all restrict flow differently. That is why you always calibrate with the water distributor connected, and each zone separately.
A factory default is stored so sensible values exist from the start. For accurate amounts you calibrate once yourself.
HOW ACCURATE IS IT? Even after a clean calibration all ml figures remain approximate values — expect roughly ±5%, and with long hoses, large height differences or a drip hose ±10% or more. How accurate it gets depends mostly on how carefully you read the scale.
Before starting: fill the water tank. Not because of the pump — the built-in diaphragm pumps tolerate running dry for a short time — but because without water there is nothing to measure, and air in the hose distorts the result.
1Set pump power first
If you want to change the pump power (%) of a zone, do it BEFORE calibrating — the measured flow only ever applies to the power currently set.
Caution
After any later change of pump power, recalibrate the flow — otherwise the ml figures are wrong. How to set the power is described in the guide "Pump power".
See also: Pump power
2Purge the air
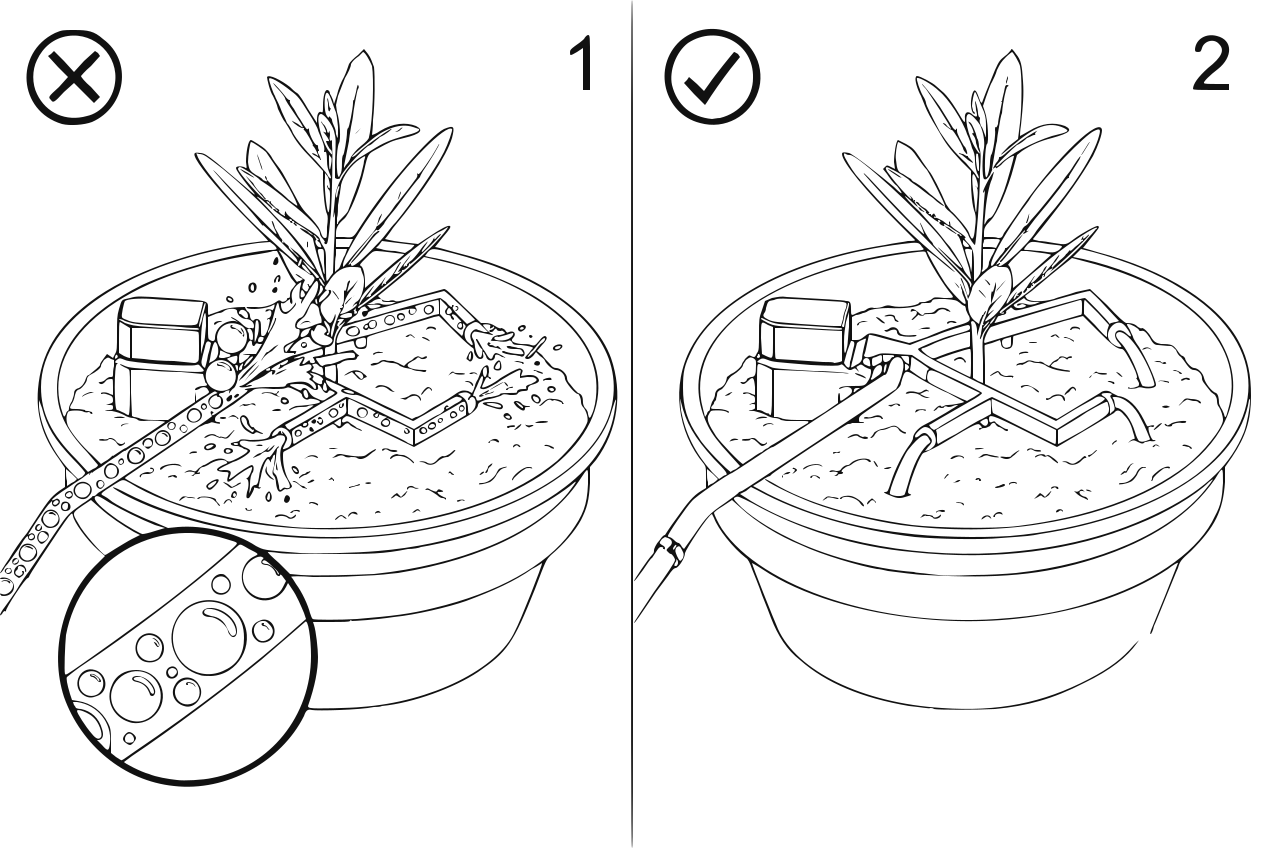
Purging: hose completely filled with water up to the distributor Before measuring, the hose must be completely filled with water all the way to the water distributor. Just water normally once: open zone → "Water now (5s)" (on the device "Manual pump (5s)") — and repeat until water comes out evenly. The water may already run into the measuring cup or a bucket.
Caution
If there is still air in the hose, the pump delivers air instead of water during the measurement. The result comes out too low — and with it every later watering amount.
3Place the water distributor in the measuring cup
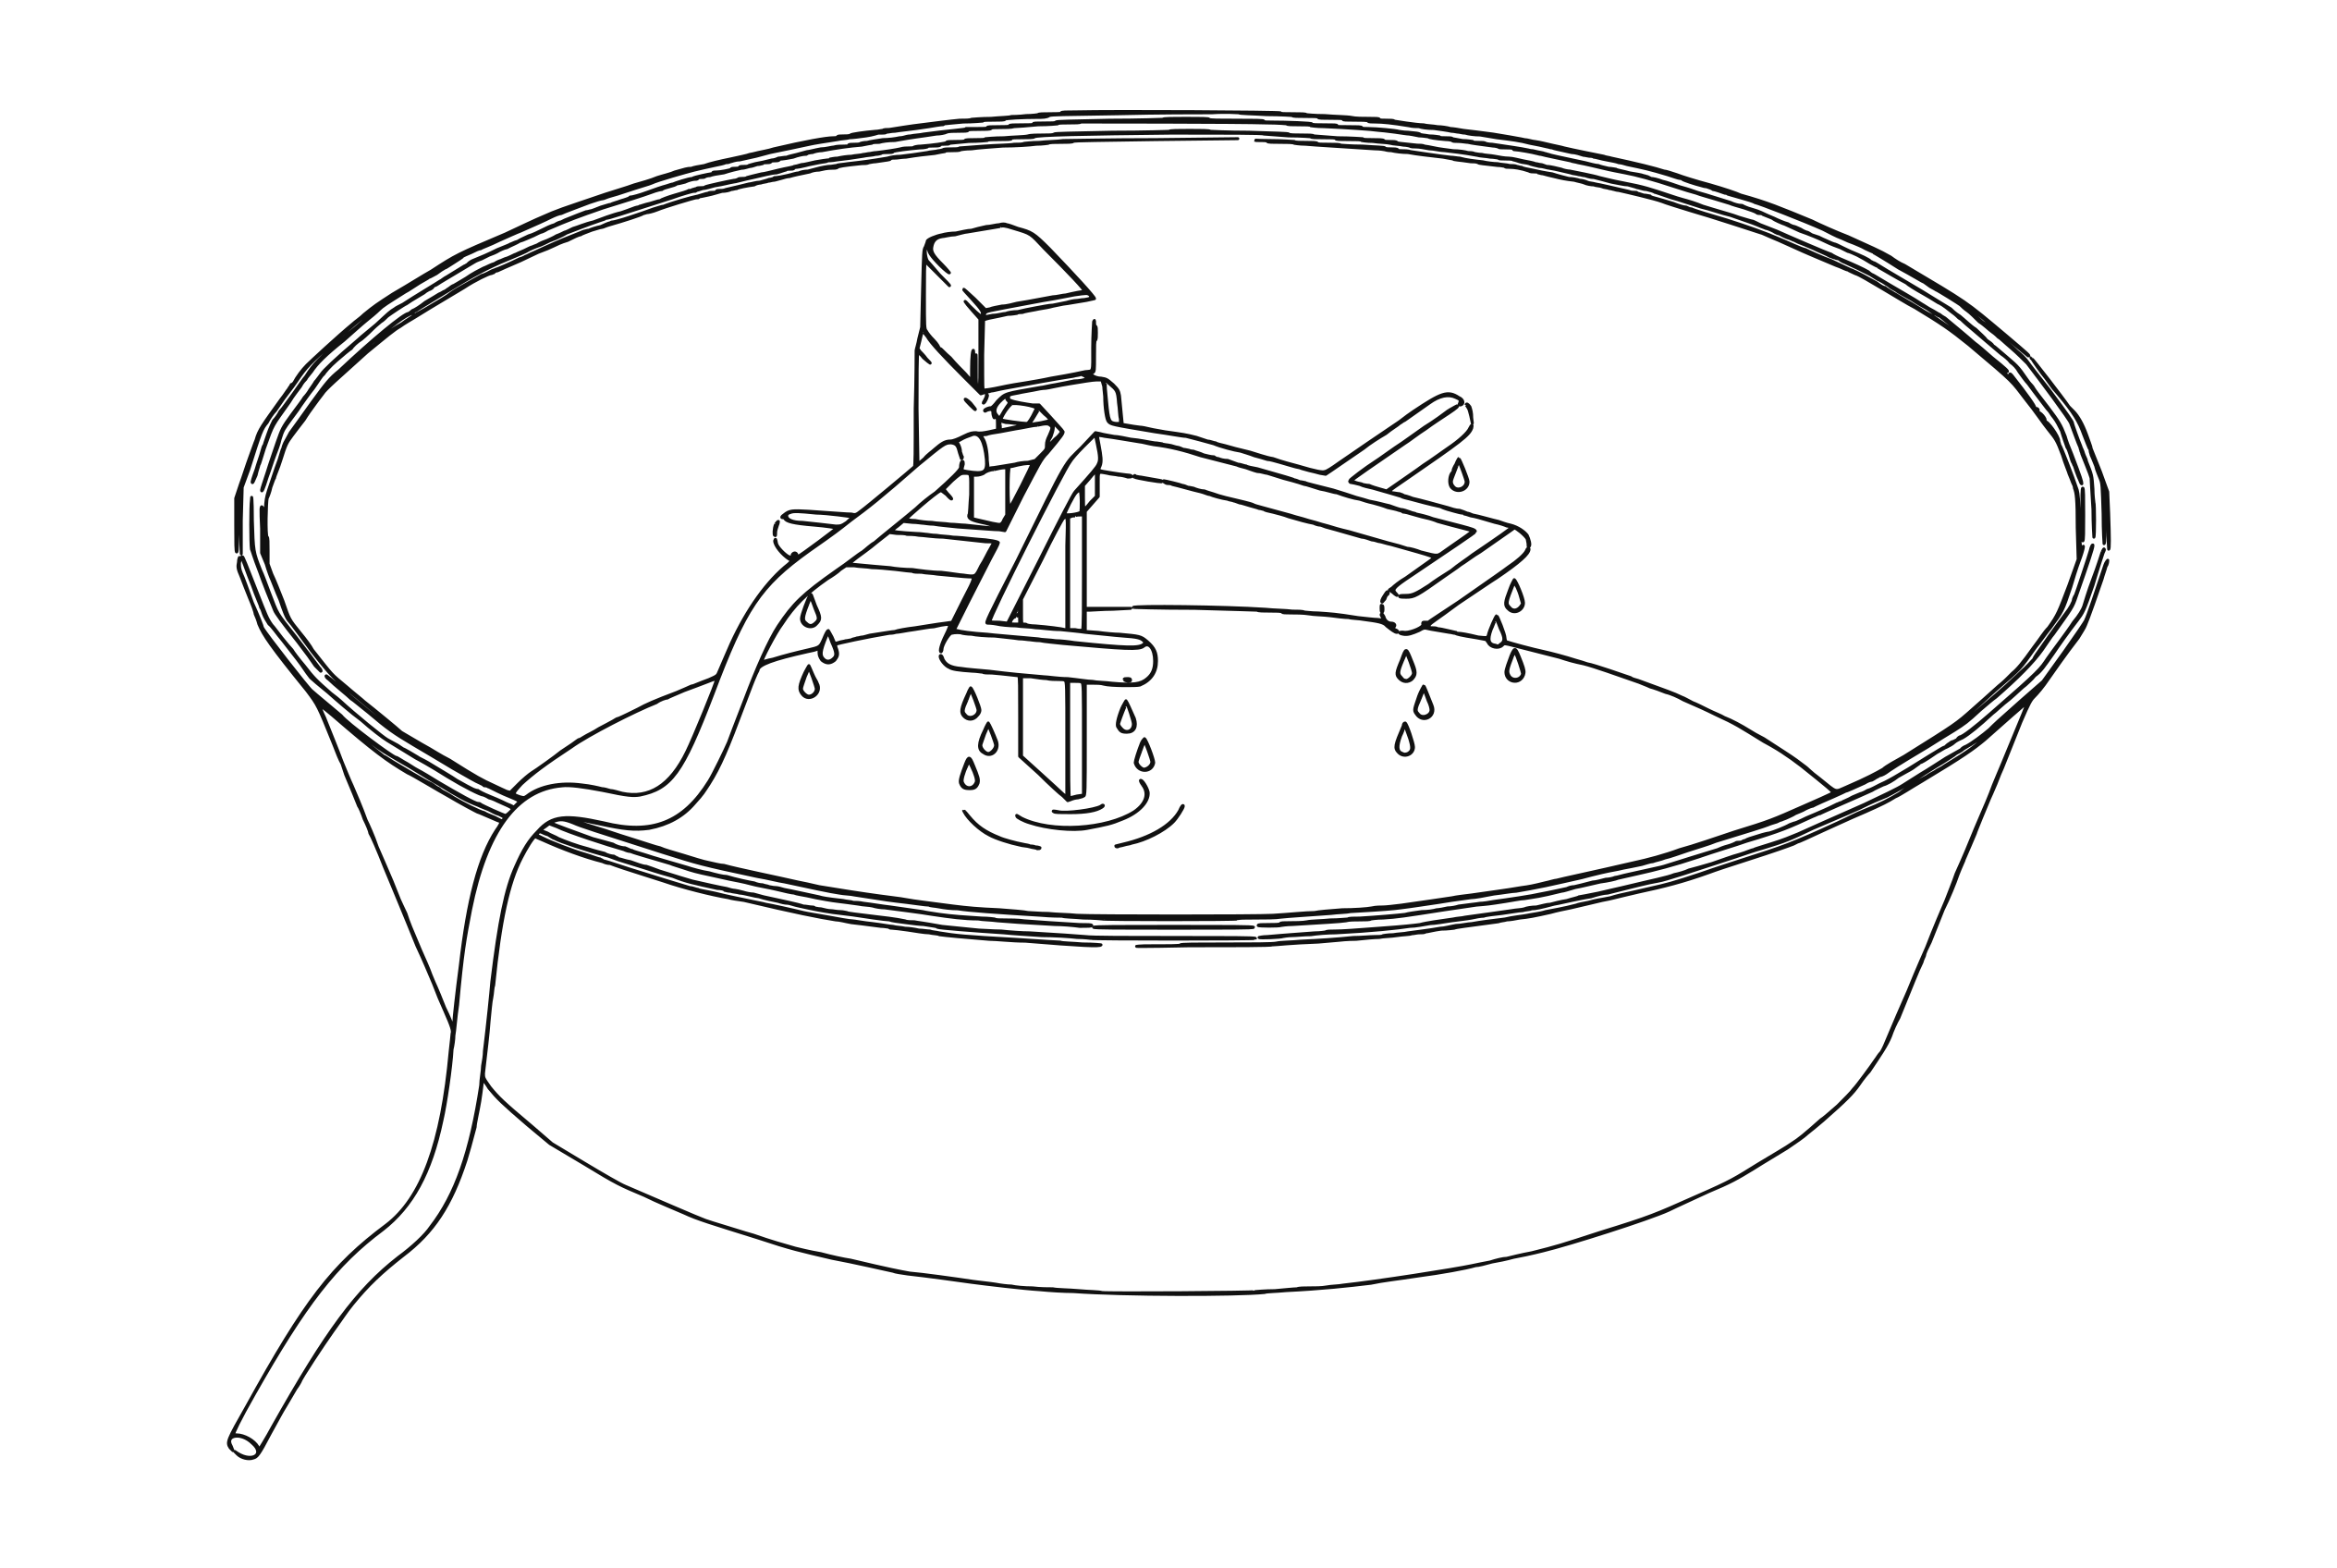
Measuring setup: distributor in the collecting basin, suction hose at the bottom of the tank Put the zone's water distributor — depending on your setup also the Y-splitter or drip hose — into a measuring cup or another catch container. Empty the container first, otherwise you also measure the water from purging.
Caution
The water distributor must stay connected! Without it there is no back pressure — the measurement would come out too high and all amounts would be wrong.
4Open calibration
The way in differs between app and device — the result is the same.
In the app
Settings → Pumps → expand "Pump settings" → under "Flow rate" tap "Calibrate flow rate" → choose zone. Alternatively straight from the zone: open zone → "Calibrate".
Before the pump starts, you have to check the box "Filter submerged, circuit filled and free of large air bubbles". If the circuit is still full of air – for example at first setup – tap "Pump 3 s" first until the water comes out without large bubbles.
On the device
Settings → Pump settings → "Calibrate flow rate" → choose zone. Here too you first confirm with the checkbox that the circuit is prepared. During setup, "Pump 3 s" sits next to it.
5Start the pump run
Tap the start button (in the app it is called "Start auto-calibration"). The pump runs for exactly 20 seconds. On the device a countdown shows the remaining time; the app waits with a loading indicator.
Caution
Never cancel the run early: the flow rate is always calculated with the full 20 seconds. Stopping sooner produces a value that is too low — better to start over completely.
6Read and enter the amount
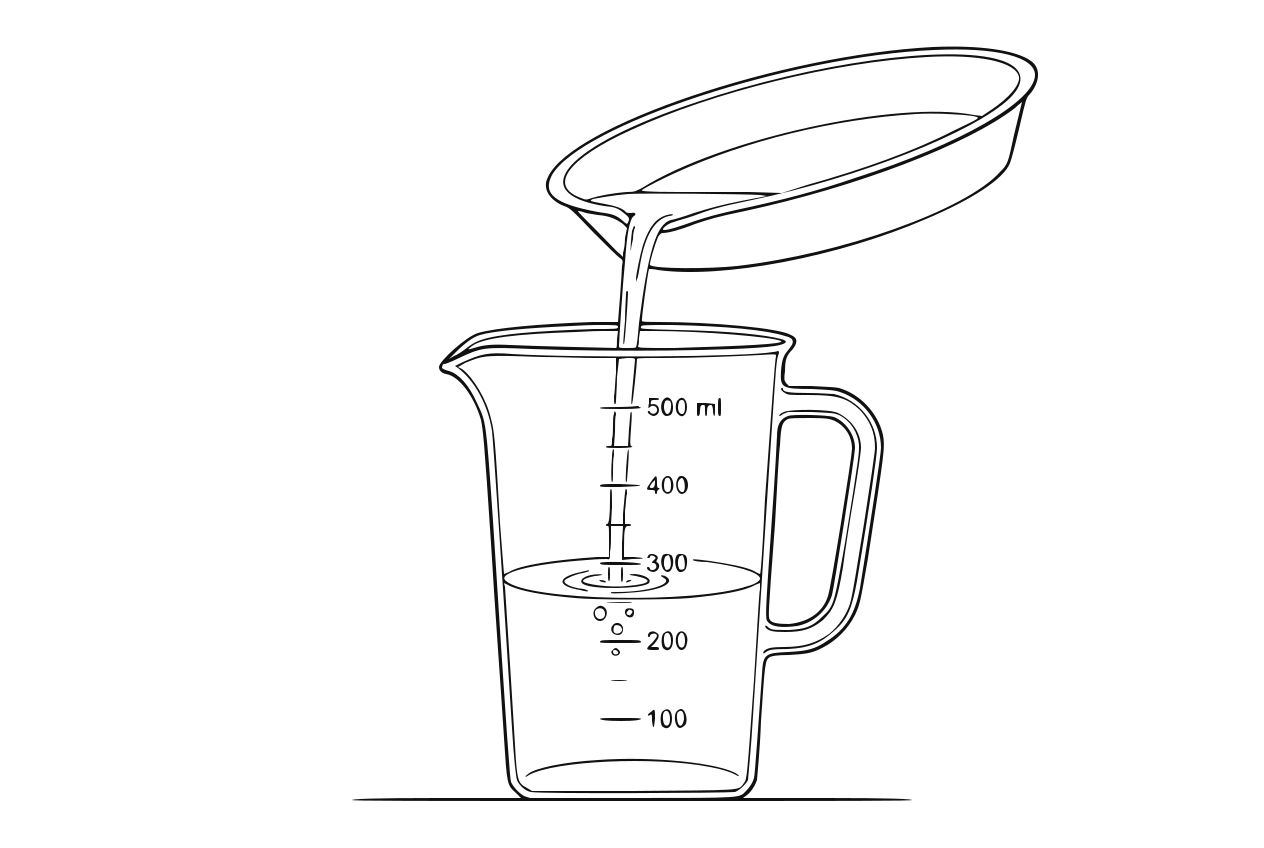
Measuring cup on a level surface, read at eye level Put the measuring cup on a level surface and read it at eye level. The system computes the flow rate in ml/min from the amount.
In the app
Type the measured milliliters straight into the input field — these are the ML FROM THE MEASURING CUP, not the flow rate.
If you already know your flow rate, enter it directly under Settings → Pumps → Flow rate instead. There it is ML PER MINUTE.
On the device
Set the amount with the − and + buttons in 10 ml steps — here too, the milliliters from the measuring cup.
Entering the value directly works as well: Settings → Pump settings → "Enter value manually" → choose zone. There the input is in ml per minute.
Tip
This step decides the accuracy of the whole system — the more carefully you read, the better all later amounts match.
7Save and repeat for every zone
Tap "Save" — the new value applies immediately. Repeat for every zone in use: every pump delivers slightly differently, and every zone has its own hose path and water distributor.
Caution
Recalibrate as soon as anything on the water path changes: a different or readjusted water distributor (e.g. an adjustable sprinkler), a different hose length, a new plant height or changed pump power.
See also: First steps
GOOD TO KNOW
- The calibration applies exactly to the combination you measured with: pump power + hose + water distributor. If one of them changes, the value no longer fits.
- Without your own calibration everything keeps running on the factory default — watering still works, the ml figures are just coarser.
- Saved calibrations survive a restart and a firmware update.
- If amounts are noticeably off despite calibration, check the suction filter, check valve and suction height — see "First steps".
- The measured value is the ANCHOR for usage adjustment: when the device later corrects the flow rates by itself, it may deviate at most 20% from this value, in either direction. Without your own calibration the factory value is the anchor. There is always one — the adjustment cannot drift away without limit.